Tuesday 18 September 2012

Neom Luxury Organics - 'Harmonise' Triple Wick Candle

'Out of clutter, find simplicity'
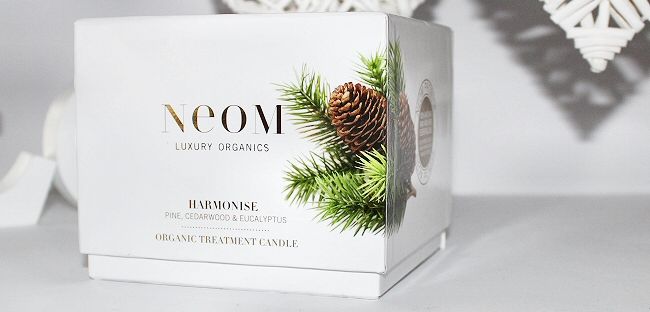
 NEOM - 'Harmonise' Organic Candle* - £39.50, also available in travel size for £15. 
100& Natural Wax and Pure Essential Oils.
No synthetic scents, paraffin wax, black smoke or toxins.

One of the latest products to launch from Neom Organics is their Harmonise candle, scented with Pine, Cedarwood and Eucalyptus with underlying green hibiscus and deep wood notes. All of their candles are hand poured in the UK, made from a special blend of 100% natural vegetable waxes and essential oils, nothing synthetic is added and they burn for up to 50 hours.
As a chef, I have quite a stressful job. The hours are long, you're constantly on the go and there's always something else to do, it's a male dominated industry and sometimes as a female, you have to work twice as hard to prove your worth and show you can do the job just as well, if not better! In the Hospitality Industry, most places have a high turnover in terms of chefs as stress is a big issue, not to mention that alcoholism, drug abuse and depression are also common. A working week for me can be anything from 50 hours to 80 without a break, so taking time out to relax is essential. When I was offered the chance to try out Neom's Harmoise candle which is aimed at those wanting to 'focus, treat tiredness, energize and help concentration' as well as working as a holistic treatment, I instantly said yes!

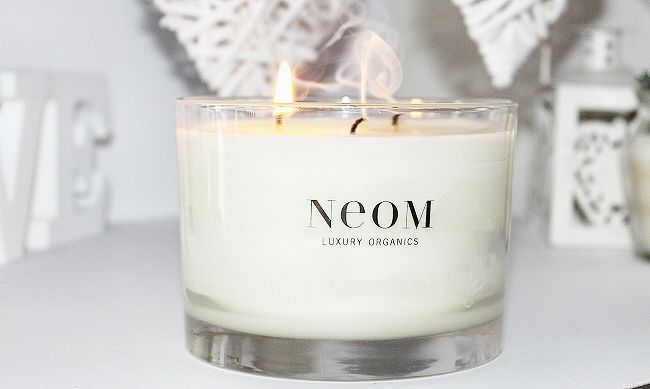
As you open the box and release the candle from its casing, you're instantly hit with a fresh woody, eucalyptus scent that fills the room - and that's even before you've started burning it! Considering I usually opt for sweet scents I surprised myself by instantly warming to the fragrance which reminds me of long, country walks and the first deep breathe of air you take when you've been cooped up indoors all day and finally venture outside. It's a very refreshing, yet calming scent.
Described as being for times when 'you need a moment of restoration, to treat tiredness and to encourage focus. A gently energizing blend, perfect for helping clarity and concentration.' I'd have to agree. When a quiet moment opens itself up, I like to light up my Neom candle, open the latest book I'm reading (Bared To You, risque!) and get lost in the moment. When I re-surface, I feel refreshed and tranquil.
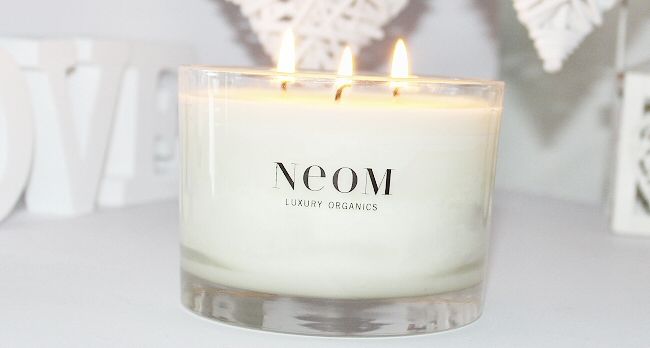
The candle itself is stunning, there's no glitter, or flashy ribbons - nor would there need to be. The triple wick, classic NEOM stamp, and simplistic, weighted glass are classy, simplistic but ooze luxury. With a price tag of £39.50 these are undoubtedly more expensive than most, but these would make a beautiful gift or a well deserved treat to yourself if you're stressed, studying, in need of relaxation or just adore candles as much as myself! 

I have my eye on the 'Invigorate' candle for when this one is all used up!
 Have you tried anything from Neom?

Saturday 15 September 2012

Mac Mineralize Skinfinish in 'Soft and Gentle'

Mac Mineralize Skinfinish in 'Soft and Gentle'
£21.50
'A luxurious velvet-soft powder with high-frost metallic finish. Smoothes on: adds buffed-up highlights to cheeks, brows, anywhere on the body: provides an ultra-deluxe polish to the skin.'

For the longest time I had absolutely no interest in highlighter. I've always had combination/oily skin but hated my skin to look dry and cakey so steered clear of setting my make up with powder, and would never want to add more shine. Oh how naive I was.
Fast forward a few years and I now realise that all you need is to find the right foundation and powder combinations that look natural together. Especially in Summer, I tend to stick to matte skin and add in a glow with a highlighter. I recently picked up the Mac Mineralize Skinfinish Highlighter in 'Soft and Gentle' and it's become a firm favourite. I do find the product description slightly scary (high-frost metallic finish?!) and I do have to admit, in the pan it does look packed full of shimmer but on the skin it adds a beautiful luminosity. I don't find this to look frosty or glittery, it just adds a gorgeous radiant effect which, paired with a bronzer, leaves you looking like a Bronzed Goddess.
I would advise to be light handed with this product, you literally need to tap your brush in once and then dust along the cheekbones, or wherever you want a highlight. I've no doubt this will last me ages, more than likely a good year or so as you only need the smallest amount.
Just to give you an idea of the type of highlighters I like, I also adore the Bourjois Highlighting Powder, Illamasqua Gleam Cream 'Aurora' and Jemma Kidd's Dewy Glow 'Iced Gold'. I didn't like the Highlighting Powder in the Sleek Duo as I found it far too glittery and frosty!

Tuesday 4 September 2012

How To: Big Brows

 
Let me start by saying I'm no eyebrow expert. These are just tips and tricks that have worked for me..

For years I over plucked my eyebrows. If you want an idea of what they looked like before, have a look at this FOTD which includes an awful up close shot - oh how I cringed when I saw it! I pretty much had 'tadpole eyebrows' which for those of you who are unfamiliar with the term, means I had a thick section at the start of the eyebrow and then the rest got thinner until they were almost non existent. If that wasn't bad enough, I would fill them in every day with a dark brown shadow, square off the front with an angled brush and forget about combing through to blend the colour, of course I didn't bother with that!
It wasn't until I started seeing models with thicker eyebrows and started watching Lisa Eldridge on Youtube that I started longing for thicker brows. The first struggle for me was to quit plucking. I hate seeing stray hairs and my first instinct is to grab the tweezers but you have to just leave them be - of course you can still get the hairs between your brows, no one likes an unobrow!
To help my eyebrows along in the re-growth department, I brought RapidLash and used that every night which helps the hairs come through quicker and thicker. If you have the money to spare, definitely invest in a tube of RapidLash - you wont regret it! Once I'd started to notice them thickening up, I decided to dye them. My eyebrows are naturally an ashy dark blonde so when I dyed them it meant I didn't need to fill them in as much as they matched my hair colour and it shows up all the little, fine hairs you might not of known you had!
Once you have a decent amount of growth it's time to go in with the tweezers. I was lucky enough to be sent the Anastasia Brow Kit so I used a stencil from there, but you can find stencils in Superdrug and Boots. I opted for the full brow stencil, filled in my eyebrows and then plucked any stray hairs. I also brought a little spooly brush and a small pair of scissors and carefully combed any longer hairs down and trimmed them, this helps create your natural eyebrow shape.
The final step is to fill them in, and remember - minimal product! I use an eyebrow pencil or an eyeshadow and once my eyebrows are lightly filled in - only where needed, I brush them through with a spooly to get rid of any excess product. I then set them with the MUA clear mascara.
If you want to go for the full on 'Model Brow' like the photograph above, all I did was fill them in lightly with a powder, then brush through them with Mac's 'Beguile' Eyebrow Gel. This adds a base colour and then a slightly darker shade which really adds dimension to the brows.

I hope this is helpful in some way!